

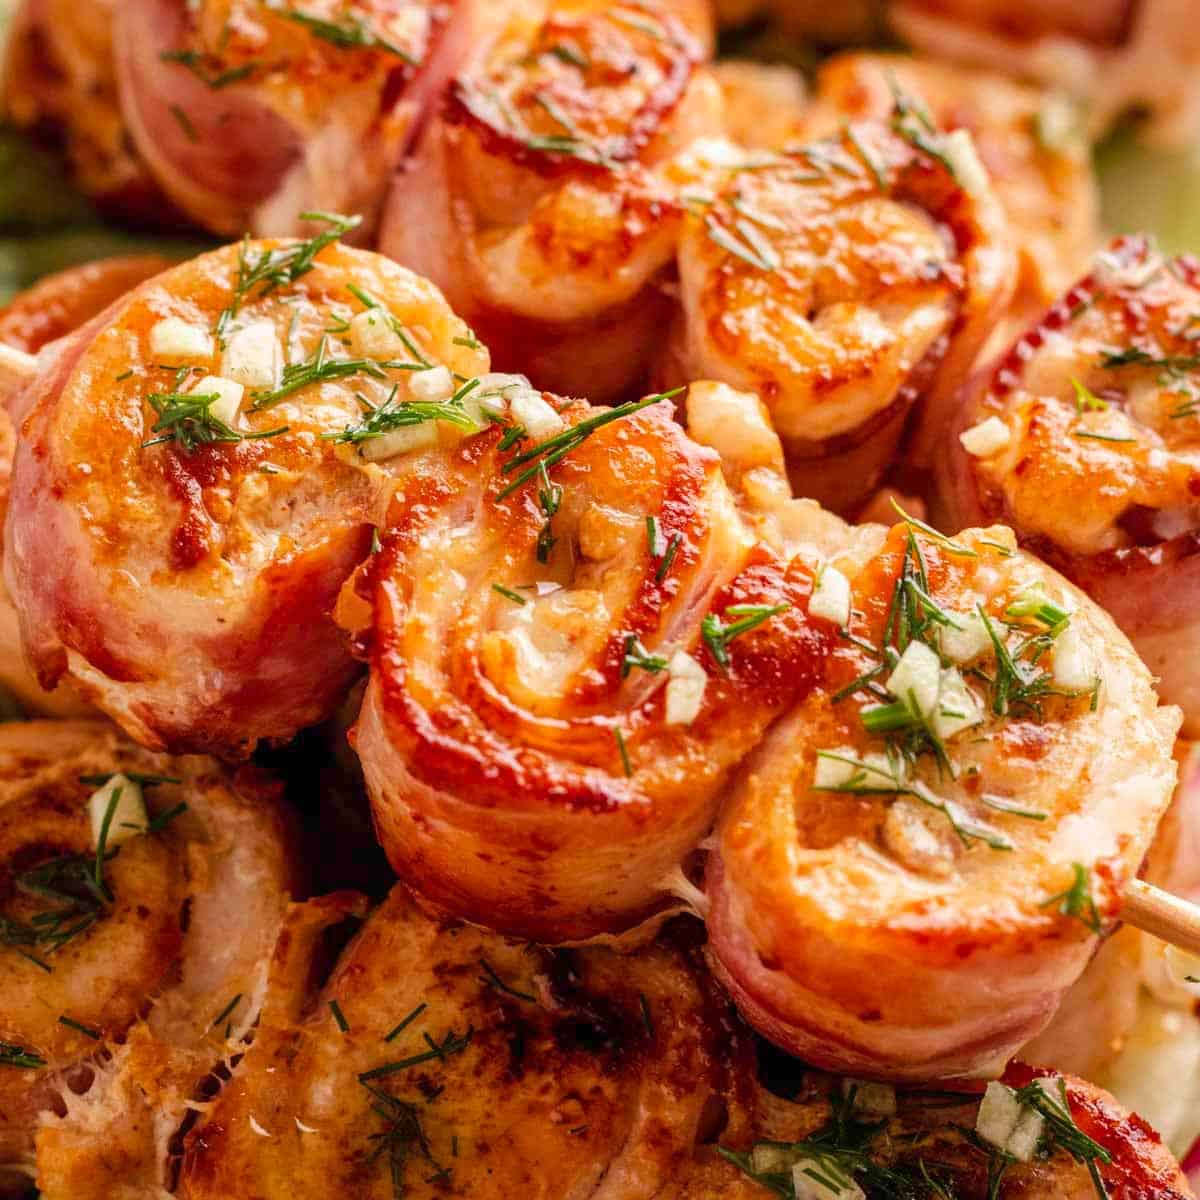
These Bacon Chicken Roll Ups are a go-to in my kitchen when I want something quick, fun, and full of flavor. They're juicy on the inside, crispy on the outside-and work just as well in a skillet or on the grill.

I love that they feel a little fancy but are actually super easy to make. Just a few basic ingredients, one pan (or the grill!), and dinner is done in about 25 minutes. Perfect for busy weeknights or casual cookouts.

Want to Save This Recipe?
Enter your email and we’ll send the recipe directly to you!
By submitting this form, you consent to receive emails from The Yummy Bowl.
Ingredients
- Chicken breast - Go for boneless, skinless. I use two medium-sized pieces and slice them lengthwise to make them easier to roll.
- Bacon - Regular bacon works best here. Avoid thick-cut-it doesn't wrap or crisp up as well.
- Smoked paprika - Adds a little warmth and depth. If you don't have it, use regular paprika or chili powder.
- Salt - Just a pinch goes a long way. Bacon already adds saltiness, so don't overdo it.
- Olive oil - I use this for searing in the skillet, but avocado oil works too.
- Butter - Melted for brushing the pinwheels. Use salted or unsalted-both are fine.
- Fresh dill - Adds a pop of color and herby flavor. You can sub with parsley if you prefer.
- Garlic - Freshly pressed or finely chopped. Don't skip it-it adds a big punch to the butter mixture.
- Wooden skewers - If grilling, soak them in water for 30 minutes beforehand so they don't burn. (Skip soaking if cooking in a skillet.)
📋 You can find the full ingredient list in the Recipe Card below the article.
How To Make Bacon Chicken Roll-Ups


- Soak wooden skewers: If grilling, soak the skewers in water for 30 minutes to prevent burning. This step isn't essential if using a skillet, but it's a must for the grill.
- Prep the grill (if using): If grilling, preheat your gas grill to medium heat, or start your charcoal grill early so it's hot by the time you're ready to cook.
- Pat dry: Use paper towels to pat the chicken breasts and bacon strips dry. This helps the seasonings stick and prevents excess moisture during cooking.
- Slice the chicken: Slice each chicken breast in half lengthwise, but not all the way through-you want to butterfly it. Open each breast like a book.
- Pound the chicken: Cover the butterflied chicken with plastic wrap and gently pound it with a meat mallet or rolling pin to flatten evenly.
- Season: Sprinkle both sides of the chicken with salt, pepper and smoked paprika.
- Add bacon: Lay strips of bacon on top of the seasoned chicken, covering the surface as fully as possible. Press down slightly so they stick.


- Slice into strips: Slice the chicken and bacon together into long strips-about 1 to 1½ inches wide. Each strip should have bacon running along the top.
- Roll into pinwheels: Starting at one end, roll up each strip tightly, making sure the bacon is on the outside. The bacon helps hold everything together.
- Cut each roll in half: Follow the bacon lines when cutting. This gives you more evenly sized pinwheels that cook evenly.
- Skewer: Insert a wooden skewer through each pinwheel to hold it in place. If your skewers are too long for the skillet, cut them with kitchen scissors. Use toothpicks to secure any loose edges if needed.
- Heat the skillet: Add a little olive oil to a large skillet and heat over medium-high heat until hot.
- Cook the pinwheels (skillet method): Place the pinwheels in the skillet and cook for 3 to 4 minutes per side, or until the chicken is golden brown and fully cooked through (internal temperature should reach 165°F).
- Grill the pinwheels (grill method): If using a grill, cook the pinwheels over medium heat for about 5 minutes per side, turning once, until fully cooked through. Cooking time can vary based on your grill, so always check for doneness.
- Make the topping: While the pinwheels are cooking, mix together melted butter, fresh dill, and pressed garlic in a small bowl.
- Brush and serve: While the pinwheels are still warm, brush the tops with the garlic butter mixture for added flavor. Optional: sprinkle with freshly grated parmesan.

Tips
- Use regular-cut bacon - Thick-cut looks tempting but won't wrap as well and takes longer to crisp. I always use regular bacon for even cooking and better texture.
- Pound the chicken gently - Don't skip this step! It helps the chicken cook evenly and makes rolling so much easier. I just use a rolling pin if I can't find my meat mallet.
- Layer bacon all the way to the edges - This makes sure every bite has a little bit of bacon (and keeps the rolls from falling apart while cooking).
- Cut strips evenly - Try to make each chicken-bacon strip the same width-about 1 to 1½ inches. It helps everything cook at the same time and look neater too.
- Skewers or toothpicks work - If your wooden skewers are too long for the skillet, just snip them down with scissors. Toothpicks are great for any loose edges.
- Brush while warm - That buttery garlic dill topping soaks in best while the pinwheels are still hot. I like to do this right before serving.
- Don't crowd the skillet - Give each pinwheel some space so they sear instead of steam. If needed, cook in two batches.
- Add cheese inside - For a fun twist, add a thin slice of mozzarella or provolone inside before rolling. It melts beautifully and adds extra flavor.
- Make it spicy - If you like heat, add a pinch of red pepper flakes to the garlic butter or a tiny smear of sriracha inside the roll.
- Grill tip - Always soak skewers first if using the grill. Trust me-I've forgotten and had one catch fire. Soaking for at least 30 minutes prevents that.
- Shortcut idea - You can roll these ahead of time and keep them in the fridge until dinner. Then just cook and brush when ready!

What to Serve With Bacon Chicken Pinwheels
I love serving these with simple sides that let the flavors shine. They're great for cookouts or weeknight dinners.

Freezing And Storing Instructions
- To Store. Keep in an airtight container in the fridge for up to 3 days.
- To Freeze. Let cool, then freeze in a sealed container for up to 2 months.
- To Make Ahead. Roll and skewer ahead, refrigerate up to 1 day before cooking.
- To Reheat. Warm in the oven at 350°F or in a skillet with a splash of oil until heated through.
More Appetizer Recipes
Before You Head Out
If you gave this recipe a try, I'd be so thankful if you could leave a ★★★★★ rating and review below. It helps other readers, supports my work, and means the world to me. Thank you for being part of The Yummy Bowl family. Happy cooking! ❤️
Recipe Card
Bacon Chicken Pinwheels (Skillet or Grill)
Ingredients
Method
- Soak wooden skewers: If grilling, soak the skewers in water for 30 minutes to prevent burning. This step isn't essential if using a skillet, but it's a must for the grill.
- Prep the grill (if using): If grilling, preheat your gas grill to medium heat, or start your charcoal grill early so it's hot by the time you're ready to cook.
- Pat dry: Use paper towels to pat the chicken breasts and bacon strips dry. This helps the seasonings stick and prevents excess moisture during cooking.
- Slice the chicken: Slice each chicken breast in half lengthwise, but not all the way through-you want to butterfly it. Open each breast like a book.1 pound chicken breast
- Pound the chicken: Cover the butterflied chicken with plastic wrap and gently pound it with a meat mallet or rolling pin to flatten evenly.
- Season: Sprinkle both sides of the chicken with salt, pepper and smoked paprika.salt + black pepper, 1 teaspoon smoked paprika
- Add bacon: Lay strips of bacon on top of the seasoned chicken, covering the surface as fully as possible. Press down slightly so they stick.8 strips of bacon
- Slice into strips: Slice the chicken and bacon together into long strips. Each strip should have bacon running along the top.
- Roll into pinwheels: Starting at one end, roll up each strip tightly, making sure the bacon is on the outside. The bacon helps hold everything together.
- Cut each roll in half: Follow the bacon lines when cutting. This gives you more evenly sized pinwheels that cook evenly.
- Skewer: Insert a wooden skewer through each pinwheel to hold it in place. If your skewers are too long for the skillet, cut them with kitchen scissors. Use toothpicks to secure any loose edges if needed.wooden skewers
- Heat the skillet: Add a little olive oil to a large skillet and heat over medium-high heat until hot.olive oil
- Cook the pinwheels (skillet method): Place the pinwheels in the skillet and cook for 3 to 4 minutes per side, or until the chicken is golden brown and fully cooked through (internal temperature should reach 165°F).
- Grill the pinwheels (grill method): If using a grill, cook the pinwheels over medium heat for about 5 minutes per side, turning once, until fully cooked through. Cooking time can vary based on your grill, so always check for doneness.
- Make the topping: While the pinwheels are cooking, mix together melted butter, fresh dill, and pressed garlic in a small bowl.1 ½ tablespoon butter, 1 tablespoon fresh dill, 2 teaspoon pressed garlic
- Brush and serve: While the pinwheels are still warm, brush the tops with the garlic butter mixture for added flavor. Optional: sprinkle with freshly grated parmesan.
Nutrition
Tried this recipe?
Let us know how it was!Note: Nutrition information is estimated and varies based on the products used.
Full Nutrition Disclaimer can be found here.
FAQs
YES, but it won't crisp the same. Make sure to watch closely so it doesn't dry out.
Absolutely. Just skip the butter topping or use dairy-free butter.
Use a meat thermometer! You want 165°F in the center for safe, juicy chicken.
Not really. That step is mainly for grilling so the wood doesn't burn.
YES. Bake at 400°F for about 20-25 minutes, flipping halfway through.
Join TYB
Insider
Get access to exclusive recipes,
weekly meal plans, printable
grocery lists, and AD-FREE
browsing designed to make
mealtime easier.


Comments
No Comments