
Sauteed green beans are one of those side dishes I make on repeat.
They’re quick. They’re easy. And they go with almost everything from weeknight chicken to holiday ham. If you’re looking for garlic sauteed green beans, butter green beans, or an easy fresh green beans side dish, this is the one that actually turns out glossy and flavorful instead of limp and bland.
Sauteed Green Beans
I’ve made this recipe more times than I can count, especially for Sunday dinners and holidays. It’s simple, but there are a few small details that make all the difference.
Julia's Why-You'll-Love-It List
♥ This isn’t just butter and beans tossed in a pan. The blanching step locks in that bright green color and keeps the beans crisp tender instead of mushy. Then the quick garlic butter sauté adds richness without overpowering the fresh flavor.
♥ You get:
• Bright, slightly crisp texture
• Buttery richness
• A gentle garlic aroma
• Balanced salt and pepper finish
♥ It tastes fresher and lighter than most restaurant versions, which often overcook the beans or drown them in oil. This method keeps everything clean and glossy.
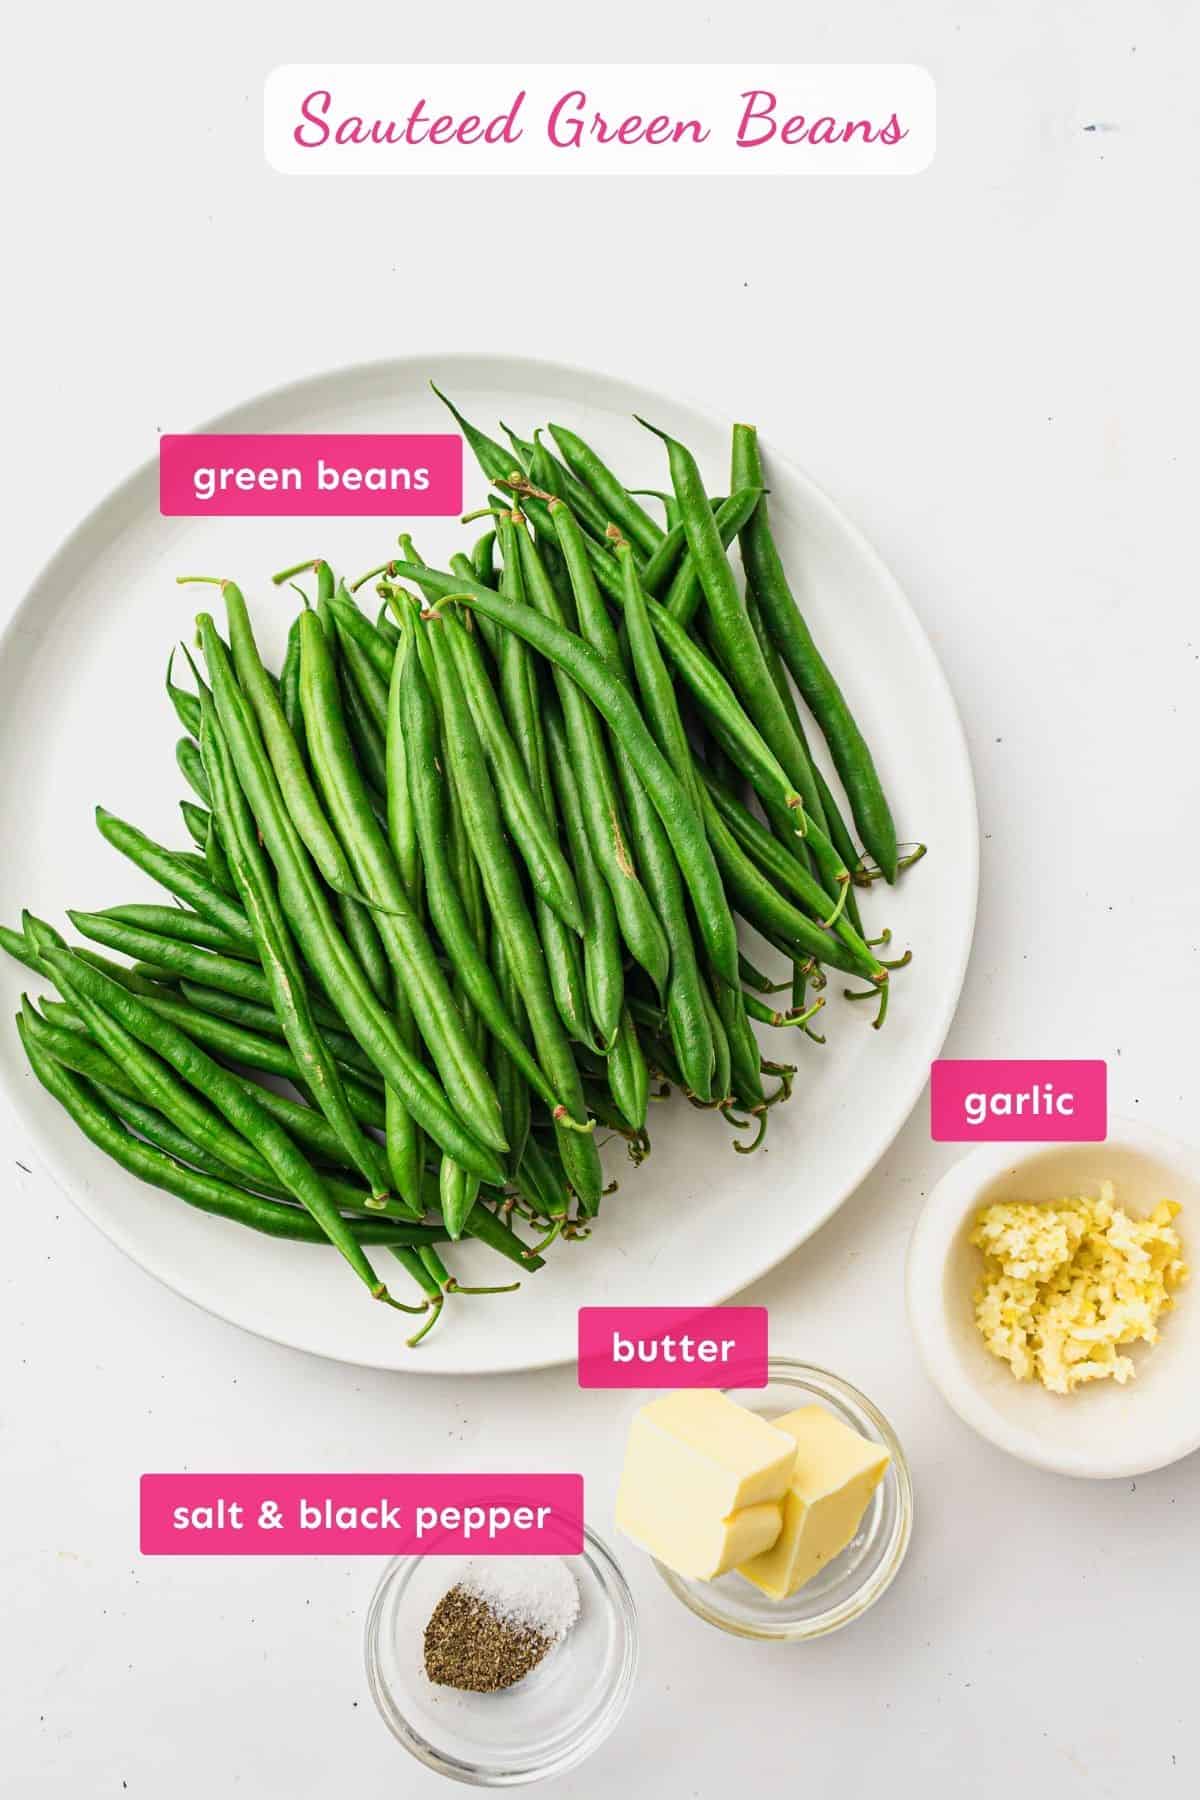
Key Ingredients
- Fresh green beans - Fresh is best here. Look for firm, bright green beans that snap when bent. If you can find thinner French-style beans, they cook beautifully and feel a little more special.
- Unsalted butter - Butter gives richness and that classic holiday flavor. You can use olive oil, but it will taste lighter and less creamy.
- Garlic - Fresh garlic is worth it. It gives that fragrant, savory base. Burned garlic is where people go wrong, so we’ll talk about that below.
- Salt - Salting the blanching water matters. It seasons the beans from the inside out.
- Black pepper - Adds just enough warmth without overpowering the dish.
📋 You can find the full ingredient list in the Recipe Card below the article.
How to Make Sauteed Green Beans (Step-by-Step)
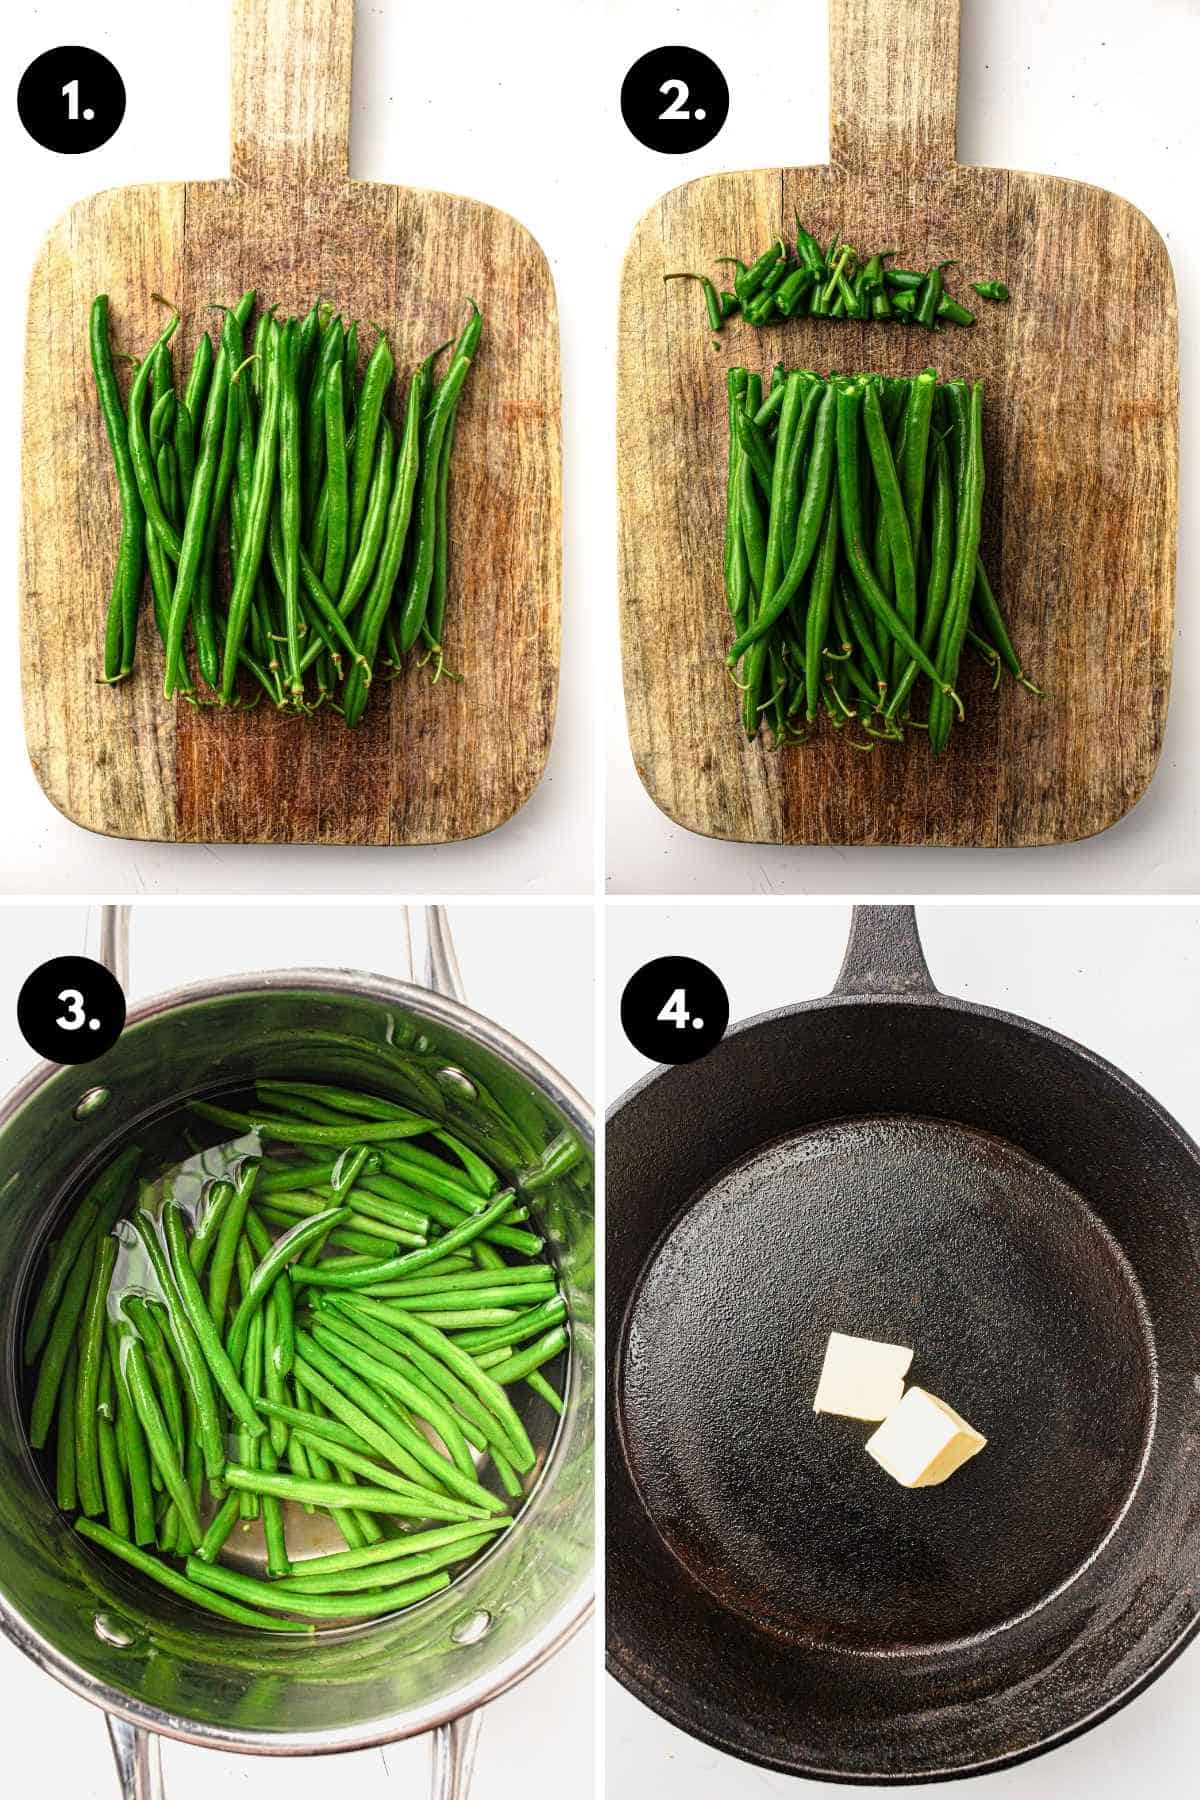
- Bring water to a boil: Fill a large pot with water and add a generous pinch of salt. Bring to a rolling boil.
- Blanch the beans: Add 1½ lbs fresh green beans and cook for 3–4 minutes. They should turn bright green and be just fork-tender but still slightly crisp.
- Drain quickly: Drain immediately. This stops the cooking. If you want extra crisp texture, you can rinse briefly with cool water.
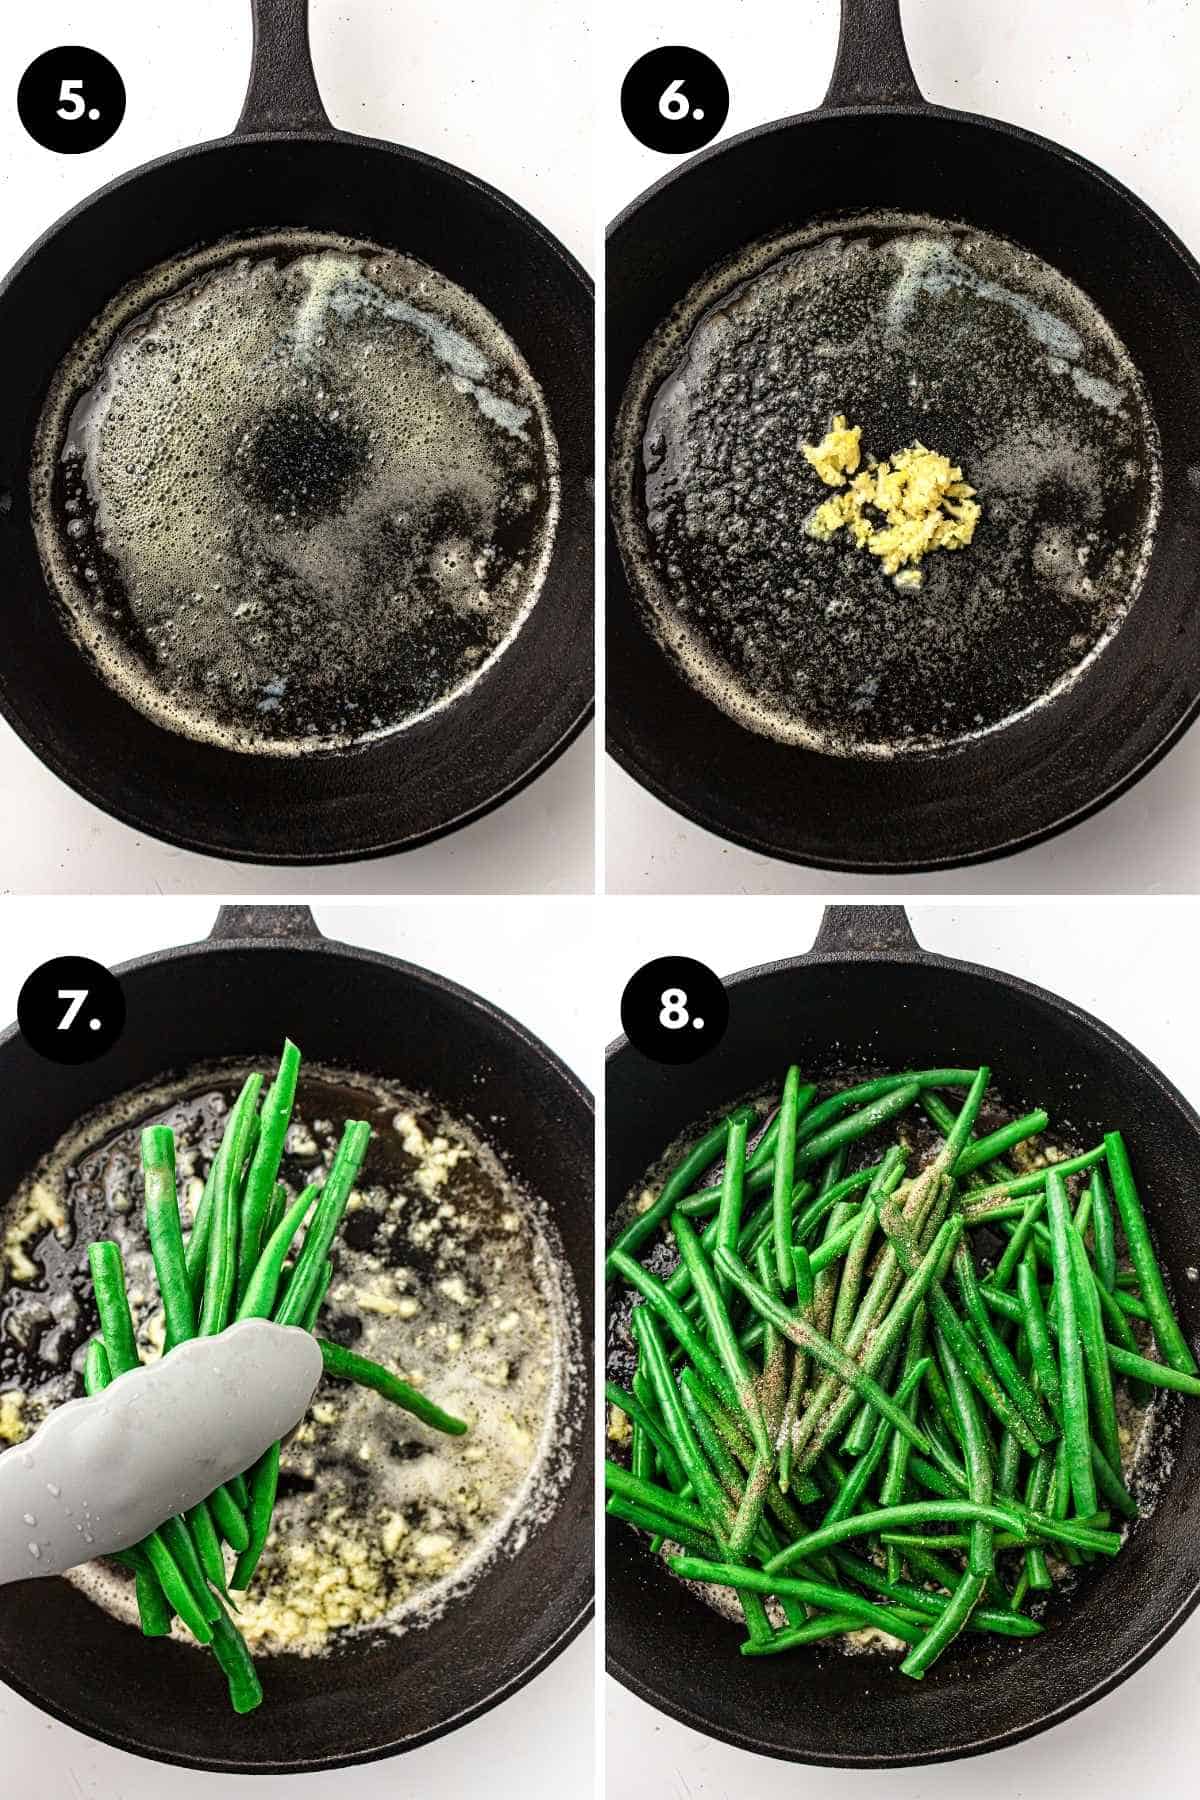
- Melt the butter: In a large skillet over medium heat, melt 3 tablespoons unsalted butter until just melted, not browned.
- Add garlic: Sprinkle in the 2 garlic and stir for 10–15 seconds until fragrant. Do not let it brown.
- Add green beans: Toss the blanched beans into the skillet.
- Season: Add ½ teaspoon salt and ¼ teaspoon black pepper.
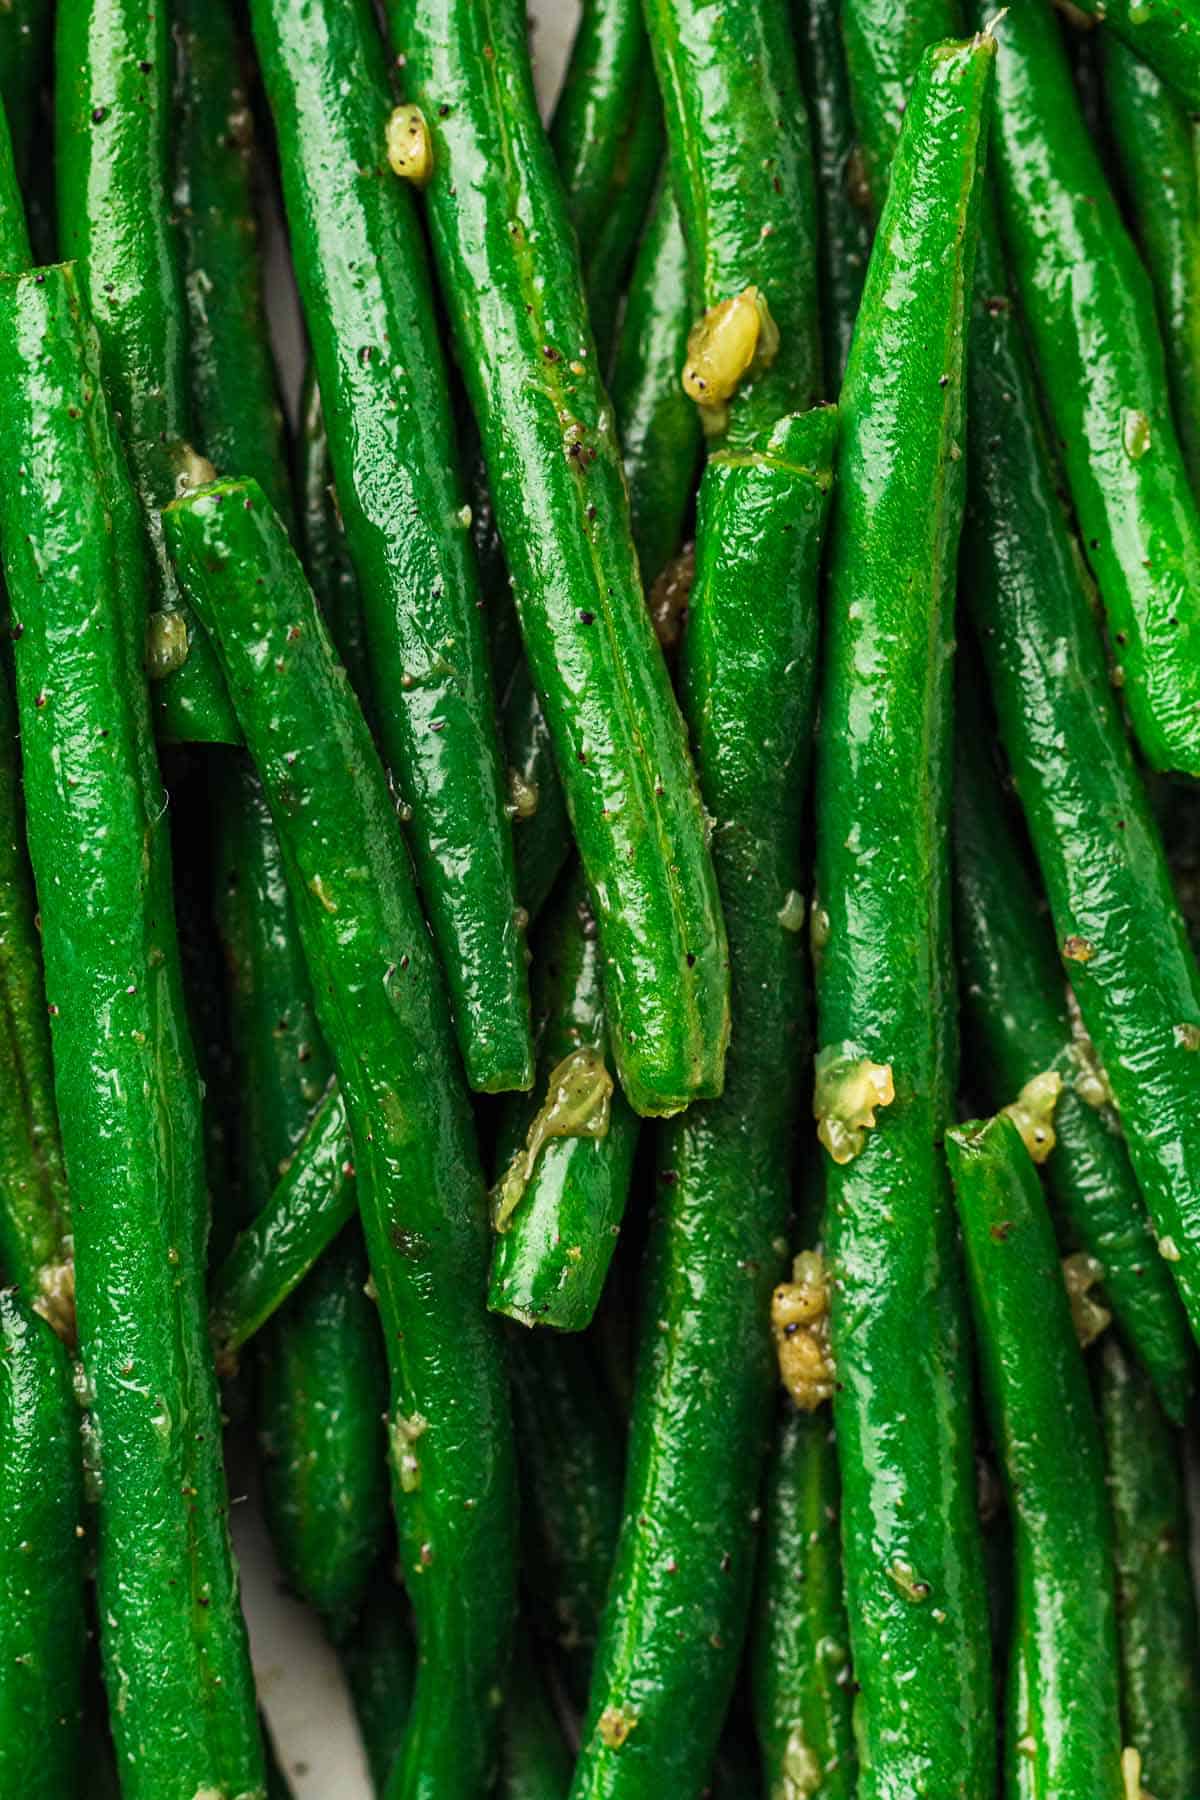
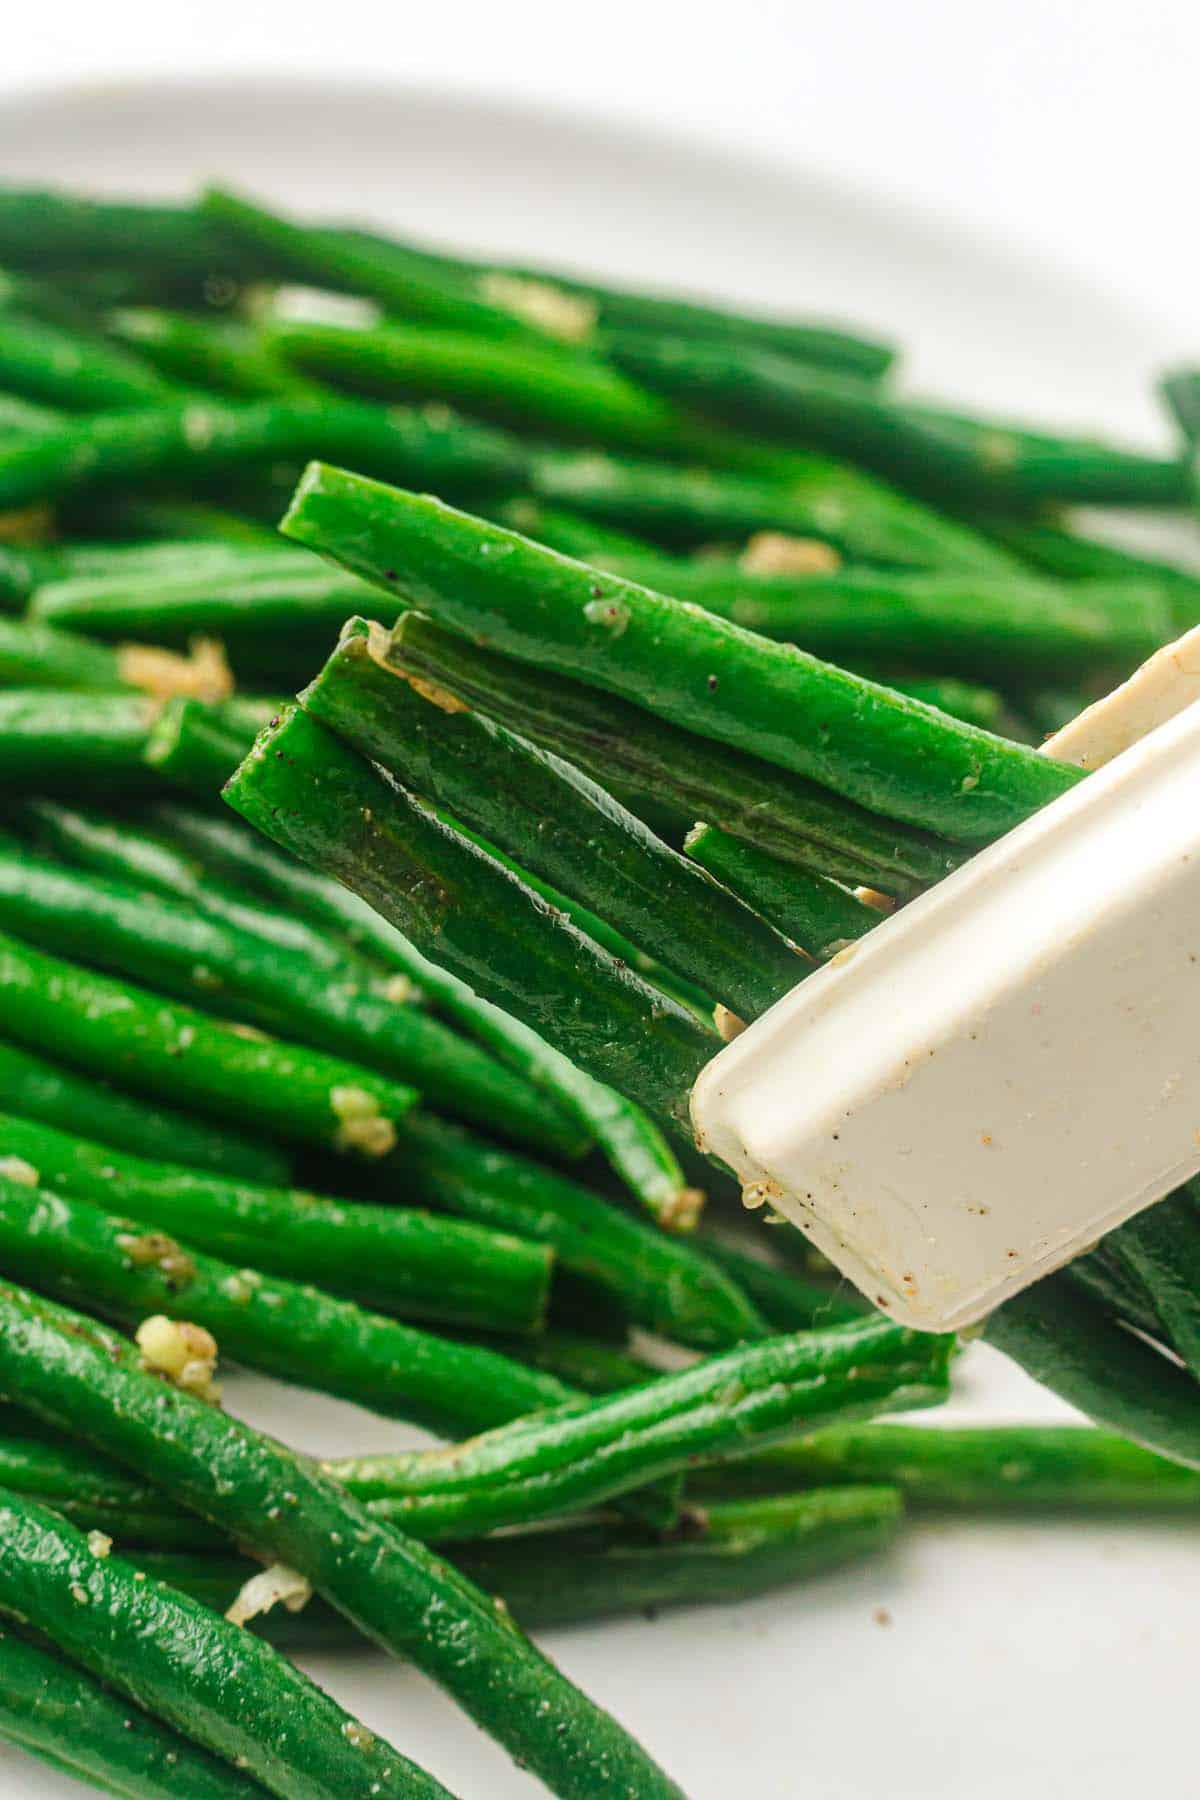
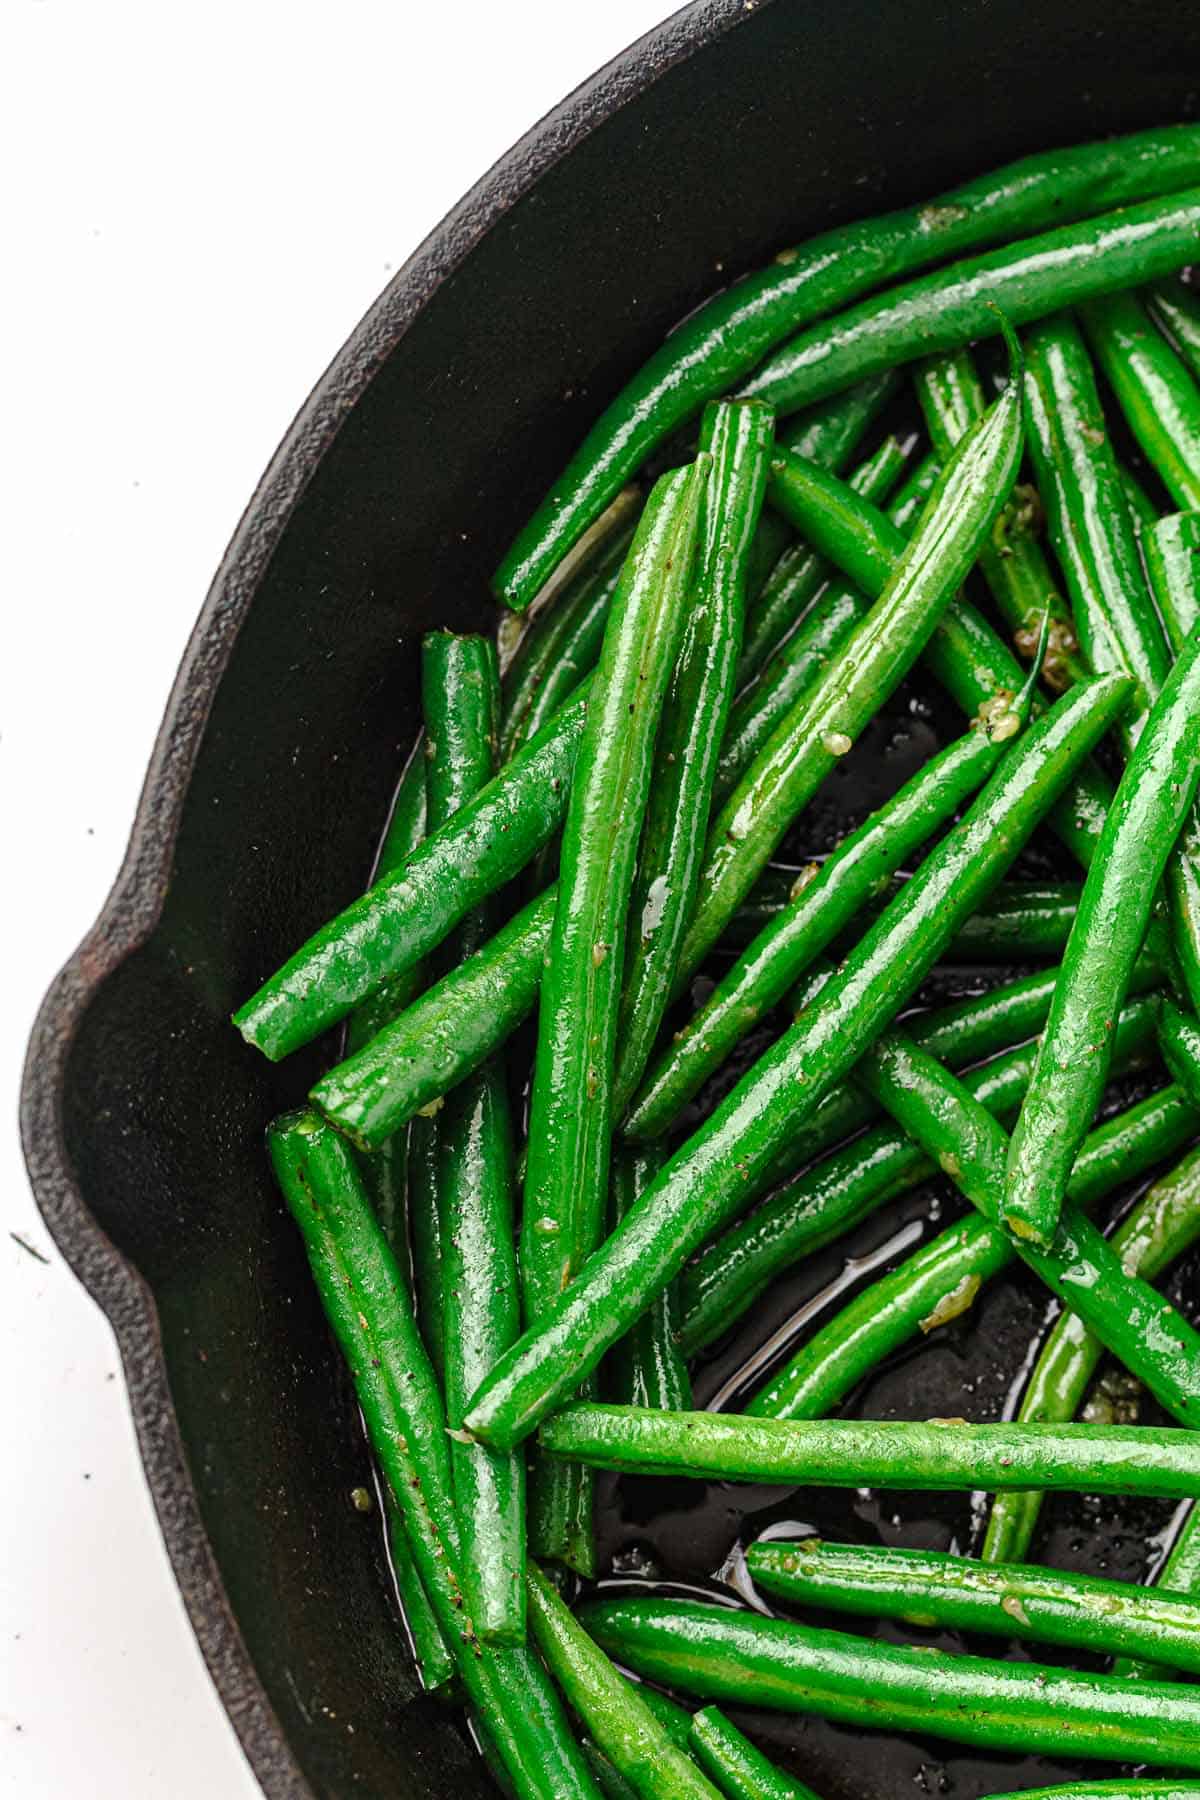
- Sauté: Cook for 3–5 minutes, tossing often, until the beans are glossy and evenly coated.
- Serve: Remove from heat and serve warm.
You’re looking for beans that are vibrant green, slightly firm in the center, and lightly coated in butter.
My Favorite Tools
 Buy Now →
Lodge Seasoned Cast Iron Skillet
Buy Now → Buy Now →
  Buy Now →
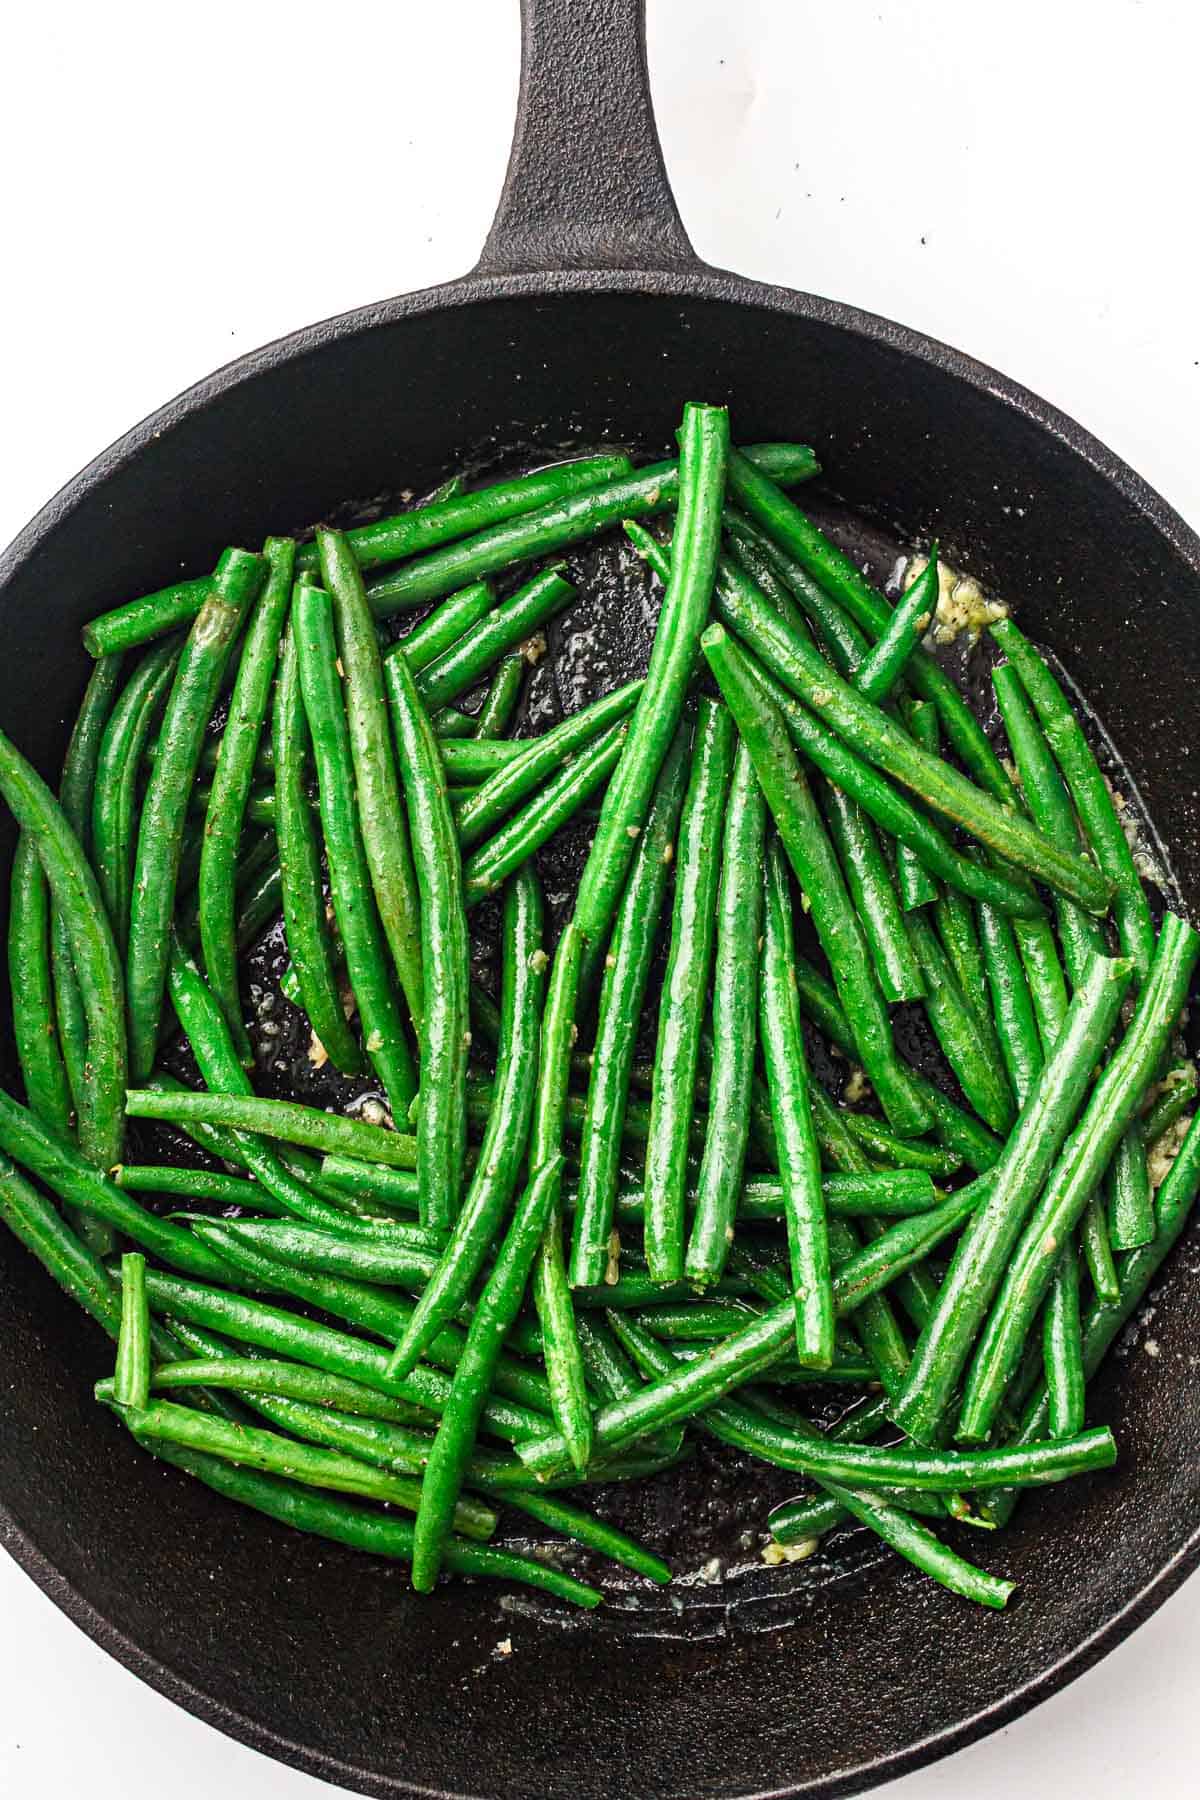
Julia's Tip
Do not overcook the garlic. Burned garlic will ruin the entire dish in seconds.
Best Tips for Success
- Don’t skip blanching. It keeps the beans bright and crisp instead of wrinkled.
- Salt the water well. This builds flavor early.
- Dry beans before sautéing. Too much water makes them steam instead of sauté.
- If the pan is too crowded, the food will steam instead of crisp and turn soggy. You don’t have to use a cast iron pan — a good nonstick skillet works just fine.
- Taste before serving. Sometimes they just need a tiny extra pinch of salt.
- Shortcut tip: Use pre-trimmed green beans to save time.
- Restaurant-style tip: Finish with a small squeeze of lemon for brightness.
Don’t Make These Mistakes
- Overcooking the beans until dull and limp. They should still have a slight bite.
- Cooking garlic too long. Burned garlic tastes bitter fast.
- Skipping seasoning in the boiling water.
- Using too small of a pan and steaming instead of sautéing.
What to Serve With
I love to pair these garlic butter green beans with:
• Roast chicken
• Baked ham
• Steak
• Creamy mashed potatoes
• Holiday dinners like Thanksgiving or Easter
They also work great alongside casseroles or baked salmon.
Storing Leftovers
- To Store. Keep in an airtight container in the fridge for up to 3 days.
- To Freeze. Not ideal. Green beans can become soft after freezing once cooked.
- To Make Ahead. Blanch the beans up to 1 day ahead. Store in the fridge and sauté just before serving.
- To Reheat. Warm gently in a skillet over medium-low heat or microwave in short intervals.
Bonus: Upgrade Variations
- Bold flavor twist: Add a pinch of red pepper flakes or a sprinkle of paprika for gentle heat.
- Lighter option: Use olive oil instead of butter for a dairy-free version.
- Restaurant-inspired version: Finish with shaved Parmesan and a squeeze of lemon.
- Family-friendly adjustment: Add a little extra butter if serving kids who prefer milder flavors.
More Quick Veggie Side Recipes
Did You Like This Recipe?
Leave a ⭐️⭐️⭐️⭐️⭐️ rating below and share it on Instagram, Facebook, and Pinterest!
Recipe Card

Garlic Sauteed Green Beans
Want to Save This Recipe?
Enter your email and we’ll send the recipe directly to you!
By submitting this form, you consent to receive emails from The Yummy Bowl.
INGREDIENTS
- 1½ pounds fresh green beans, trimmed
- 3 tablespoons unsalted butter, or 2 tablespoons olive oil
- 2 garlic
- ½ teaspoon salt
- ¼ teaspoon black pepper
INSTRUCTIONS
- Fill a large pot with salted water and bring to a boil.
- Add green beans and cook 3–4 minutes until bright green and just tender. Drain immediately and set aside.1½ pounds fresh green beans
- In a large skillet, melt butter over medium heat. Stir in garlic and cook 10–15 seconds until fragrant.3 tablespoons unsalted butter, 2 garlic
- Add green beans to skillet. Sprinkle with salt and black pepper.½ teaspoon salt, ¼ teaspoon black pepper
- Toss and cook 3–5 minutes until glossy and evenly coated. Remove from heat and serve warm.
- Enjoyed this recipe? Leave a quick 5-star rating and review to let me know!
NOTES
- If you’ve struggled with bland green beans before, try this method once. It’s simple but reliable. And once you taste that glossy garlic butter finish, you’ll make it again.
- Bold flavor twist: Add a pinch of red pepper flakes or a sprinkle of paprika for gentle heat.
ADD YOUR OWN PRIVATE NOTES
NUTRITION
💖📲 I know many of you like keeping all your favorite recipes organized. This app makes it easy to save clean, ad-free recipes from anywhere (even videos), skip screenshots, and instantly create shopping lists or meal plans for the week or a special occasion. The basic version is free, and you can grab premium features for 40% off with my code. Head over to Mealdill to check it out! 💖
Cooking more healthy veggies this week? Try my Asparagus and Tomatoes.
Note: Nutrition information is estimated and varies based on the products used.
Full Nutrition Disclaimer can be found here.
FAQs
Yes. They’re naturally low carb, simple, and made with fresh ingredients.
They were likely overcooked or steamed instead of sautéed.
Yes. Olive oil works well for a lighter version.
Don’t overcook during blanching and avoid overcrowding the pan.
Yes. Thaw and pat dry first, then cook as directed.
Key Take-Aways
• Blanching keeps them bright and crisp.
• Quick garlic sauté adds rich flavor.
• Simple ingredients done right make all the difference.
• Perfect easy side dish for busy weeknights.


Comments
No Comments